So, you’re diving into Insinkerator Installation Tips For Homeowners? Let’s make it as simple as pie! First off, gather your tools. You’ll need a screwdriver, pliers, a bucket, and maybe a towel for any surprises. Being prepared goes a long way in avoiding last-minute scrambles.
Next up, read the manual. I know it sounds boring, but those directions are your best friend right now. Each model has its quirks, so knowing what to expect really helps. Plus, you’ll save time by skipping confusion later on!
When it comes to removing your old disposal, make sure you turn off the power first. You don’t want to shock yourself! After that, detach the old unit carefully. A bucket underneath can catch any leftover gunk. We all know that’s the kind of mess no one wants on the kitchen floor!
Now, installing your new Insinkerator is the fun part. Line it up, mount it securely, and make the necessary electrical connections. Tighten everything up, and don’t forget to check for leaks after you turn the water on. A few simple checks can save you from future headaches.
Preparing Your Space for the Installation
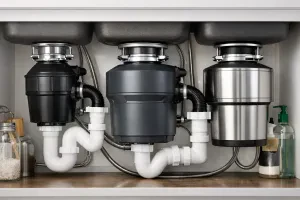
Getting your space ready for an Insinkerator installation makes the whole process smoother. A little prep work can save you time and hassle. Start by clearing out the area under your sink. Remove any cleaning supplies, pots, or containers. You want easy access to the plumbing and enough room to work comfortably.
Next, you’ll want to check if your current plumbing setup is compatible with your new Insinkerator. Look for any existing connections that might need adjustments. Sometimes, a simple tweak can make all the difference. If you're unsure, take a quick photo of your plumbing setup. This can help if you need to consult a professional or the Insinkerator manual later on.
Don’t forget to gather your tools ahead of time! Make sure you have everything you might need, like a wrench, screwdriver, and a bucket for any spills. Having your tools handy means you won’t need to pause the installation to run to the garage.
Finally, think about water and power sources. Make sure your power outlet is working and accessible for the new unit. If your sink isn’t already set up with a nearby electrical outlet, you might need to call in an electrician before you begin the installation. Keeping all this in mind will really streamline the process. These Insinkerator installation tips for homeowners aim to make your experience as easy as pie!
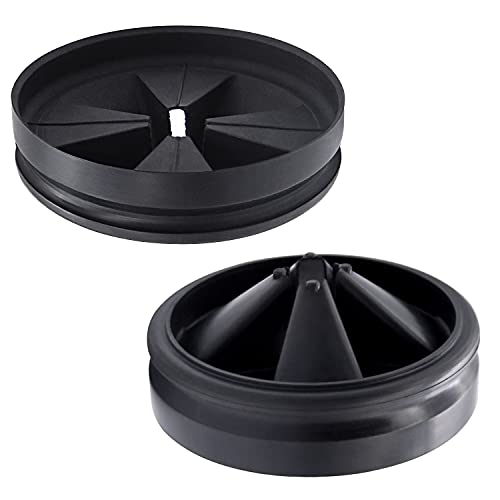
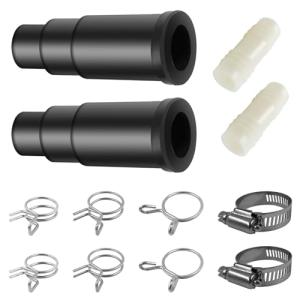
Insinkerator Splash Guards (2 Pack) Disposer Accessories
Prevent messy splatters with our convenient 2 pack of Insinkerator Splash Guards, essential disposer accessories for your kitchen sink
Product information
$14.99
Product Review Score
4.6 out of 5 stars
1188 reviewsProduct links
Step by Step Guide for Setup
Ready to install your Insinkerator? Let’s make it simple with these step-by-step Insinkerator installation tips for homeowners. You won’t need to be a handyman to get this done!
First things first, gather your tools. You’ll typically need:
Next, make sure you turn off the power to your disposal unit at the circuit breaker. Safety is key! After that, disconnect your old unit if you have one. This usually involves unscrewing a couple of bolts and detaching the drain pipe.
Now it’s time to install the new Insinkerator. Start by attaching the mounting assembly to the sink. Fit the rubber gasket and place the mounting head, tightening it well. Then, connect the disposal to your dishwasher drain if applicable. Don’t forget to secure everything in place!
Finally, plug in your disposal unit, turn the power back on, and give it a test run. Check for leaks and make sure everything sounds good. Follow these Insinkerator installation tips for homeowners, and you'll be ready to enjoy your new disposal in no time! It's as simple as that.

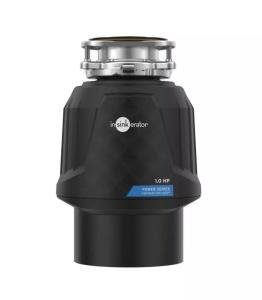
InSinkErator PRO750 with Cord Garbage Disposal Review
Maximize Your Kitchen's Waste Disposal Efficiency with InSinkErator PRO750 and Evolution Technology
Product information
$333.11
Product Review Score
4.74 out of 5 stars
167 reviewsProduct links
Common Mistakes to Avoid When Installing
Installing your Insinkerator can be a breeze if you dodge a few common mistakes. Here are some tips to steer clear of potential pitfalls and make your installation process smooth.
First, don’t skip the prep work. Make sure you have all the tools you need like a screwdriver, pliers, and a wrench. Also, read through the installation manual before diving in. This makes a huge difference and keeps you from scrambling mid-install. You want to know what goes where before you get started.
Another thing? Don't forget to check the plumbing setup. Ensure your sink has the right drain and that there are no leaks or clogs before you attach the Insinkerator. A bit of maintenance here can save you a lot of headaches later. Trust me, a clean slate makes for an easier installation.
Lastly, don’t rush through the wiring. Electrical connections are not the place to speed up the process. Make sure the power is off and follow the electric setup in the manual carefully. If you’re unsure, getting a professional to help can save you time and trouble.
By keeping these Insinkerator Installation Tips For Homeowners in mind, you’ll set yourself up for success. Take your time, double-check your work, and soon you’ll be enjoying that new disposal system without any hassle!